
Quick Answer: What the Dexcom G6 Receiver Does
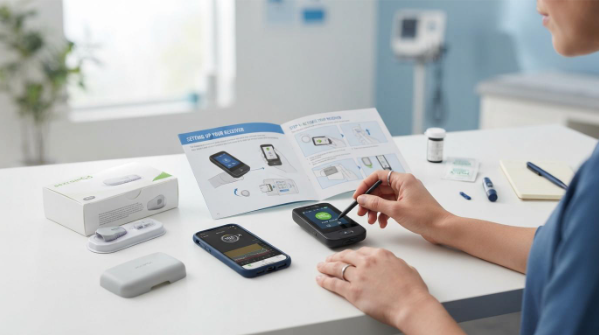
The Dexcom G6 receiver is a small, dedicated touchscreen medical device that receives glucose data wirelessly from the G6 transmitter every five minutes. Unlike a smartphone, it serves one purpose only, so it will not miss an alert due to a dead battery, an app crash, or a software update. That reliability is why clinicians often recommend the receiver even to patients who also use the Dexcom app.
How to Set Up a Dexcom G6 Receiver: Step by Step
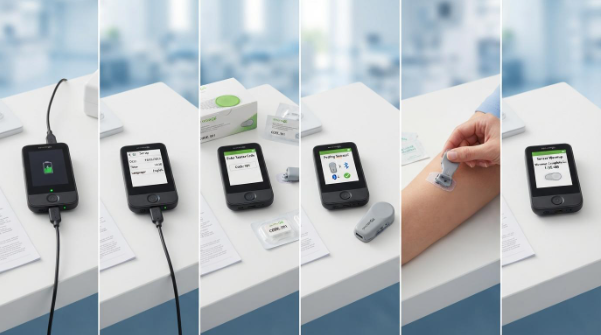
Learning how to set up a Dexcom G6 receiver is the first real hurdle for new users, so here is the process broken into stages that match what you will actually see on screen.
Once warmup finishes, your home screen will display a live glucose number that updates automatically.
Reading the Receiver Home Screen
The trend arrow next to your glucose reading is arguably more useful day to day than the number itself, because it shows direction and speed of change rather than a single snapshot.
| Arrow Direction | What It Means | Typical Action |
|---|---|---|
| Straight up | Rising fast, more than 3 mg/dL per minute | Reassess recent food or insulin timing |
| Diagonal up | Rising slowly | Monitor, no immediate action usually needed |
| Flat/horizontal | Stable | Continue normal routine |
| Diagonal down | Falling slowly | Watch for continued decline |
| Straight down | Falling fast | Treat per your care plan promptly |
Licensed DME supplier. We verify insurance before your first order and ship across all 50 US states.
Battery Life, Charging, and Storage
The receiver's battery is rated for roughly a week of continuous use per full charge, though real world life depends on screen brightness and how often you check it. A short USB charge of around 20 minutes typically restores several hours of runtime if you are caught low. Store the receiver somewhere it will not be exposed to extreme heat, since prolonged exposure above typical room temperature can shorten battery lifespan over time.
Receiver vs. Smartphone App: Which Should You Use?
| Feature | Dedicated Receiver | Dexcom G6 App |
|---|---|---|
| Purpose built for alerts | Yes, cannot be interrupted by other apps | Depends on phone settings and battery |
| Requires internet or cellular data | No | No for local readings, yes for Share/Follow |
| Screen size | Small dedicated display | Uses your existing phone screen |
| Software updates | Rare | Follows phone OS update cycle |
| Best for | Users who want a single purpose medical device | Users who want data sharing with family or clinic via Clarity |
Many patients choose to run both simultaneously, since the receiver acts as a fail safe if the phone is off, out of battery, or the app has closed unexpectedly.
Common Troubleshooting Issues During Setup
- Transmitter not found: Move the receiver closer, confirm the transmitter is snapped fully into the sensor holder, and restart the search.
- Sensor code rejected: Check for the number zero versus the letter O, a common misread on the printed code.
- Signal loss after setup: Often caused by sleeping on the sensor site or wearing tight clothing over the transmitter, which can weaken the Bluetooth signal.
- No readings after warmup: Restart the receiver by holding the power button for ten seconds, then confirm the transmitter has not shifted position. See the official Dexcom troubleshooting guide if the issue persists.
This resource was compiled by cross referencing official Dexcom instructional materials, provider training documents, and FCC filed user manuals to keep the setup steps accurate.
How long does it take to set up a Dexcom G6 receiver?
Can I use the Dexcom G6 receiver without a smartphone?
Do I need to calibrate the Dexcom G6 receiver?
What happens if my receiver and transmitter lose connection?
Is the receiver waterproof?
This guide is for general education only, does not replace the official instructions for use shipped with your device, and does not replace guidance from your endocrinologist or diabetes care team. Always follow the manufacturer's current safety statement and consult a healthcare professional before making treatment decisions based on any CGM reading.