
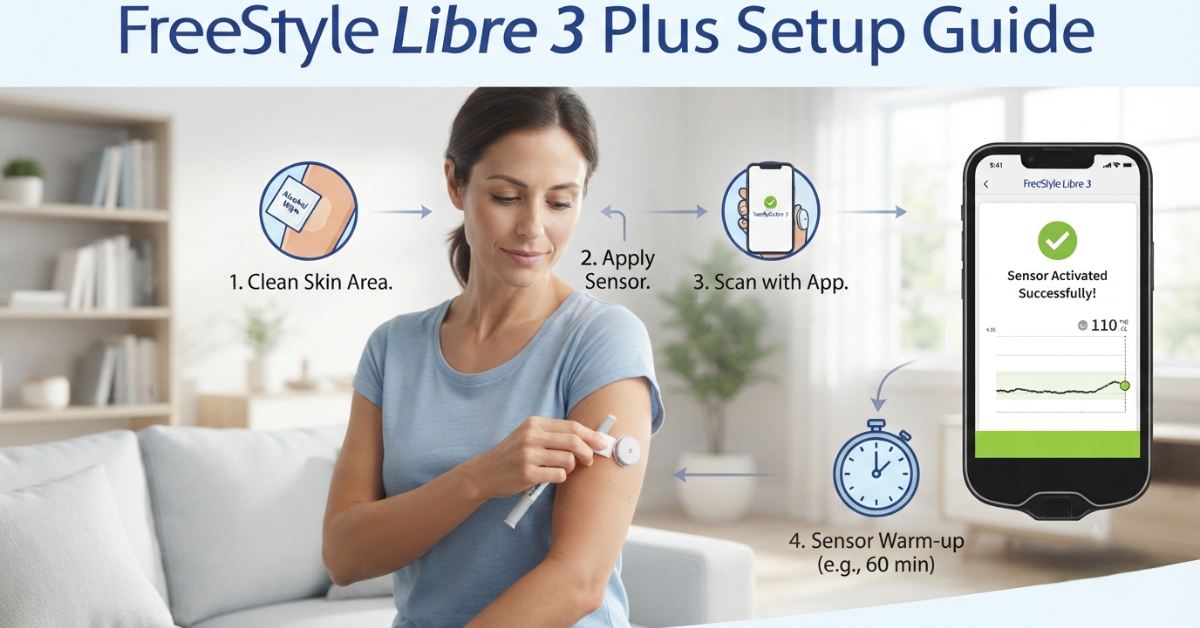
Get FreeStyle Libre 3 Plus Through Insurance is exciting, but that excitement can turn into confusion fast if the app will not pair, the sensor throws an error, or the warm up timer seems stuck. This Freestyle Libre 3 Plus setup guide walks you through every step in plain language, based on the actual application process and common real world hiccups people run into during their first week.
Whether you are switching from fingersticks or moving up from an older Libre model, this guide is written to get you scanning glucose data with confidence, not just installed software.
Why the Freestyle Libre 3 Plus Sensor Is Different From Earlier Models
Before jumping into any Freestyle Libre 3 Plus setup guide, it helps to know what makes this device stand out. The Libre 3 Plus sensor is the smallest sensor Abbott has released to date, roughly the size of two stacked coins, and it sends readings to your phone automatically every minute without a separate scanning step.
This is a meaningful shift for anyone used to older continuous glucose monitoring system models. Earlier Libre versions required you to wave a reader or phone near the sensor to pull data. The Plus version streams in the background, so your glucose trends keep updating even while your phone sits on a nightstand or desk, as long as it stays within roughly 33 feet (about 10 meters) of the sensor.
The freestyle libre 15 day wear time is another upgrade worth noting. Most sensors in this category max out at 10 to 14 days, so the extra window means fewer replacements, fewer adhesive changes, and a lower cost per day of wear for people managing diabetes long term.
What You Need Before You Start
Every reliable Freestyle Libre 3 Plus setup guide starts with preparation, not the applicator. A smooth setup depends on having the right items ready. Do not open the sensor applicator until everything below is in place.
- A compatible smartphone with Bluetooth enabled and the FreeStyle Libre 3 Plus app downloaded and installed
- An active internet connection for the initial account setup
- The sensor pack, unopened and at room temperature (a sensor pulled straight from the fridge can give inaccurate early readings)
- An alcohol wipe for cleaning the application site
- 10 to 15 minutes of uninterrupted time
One detail people often miss: Abbott recommends letting a refrigerated sensor sit at room temperature for at least 20 minutes before application. Skipping this step is a common cause of early sensor errors that has nothing to do with a defective unit.
Step by Step: Freestyle Libre 3 Plus Setup Guide
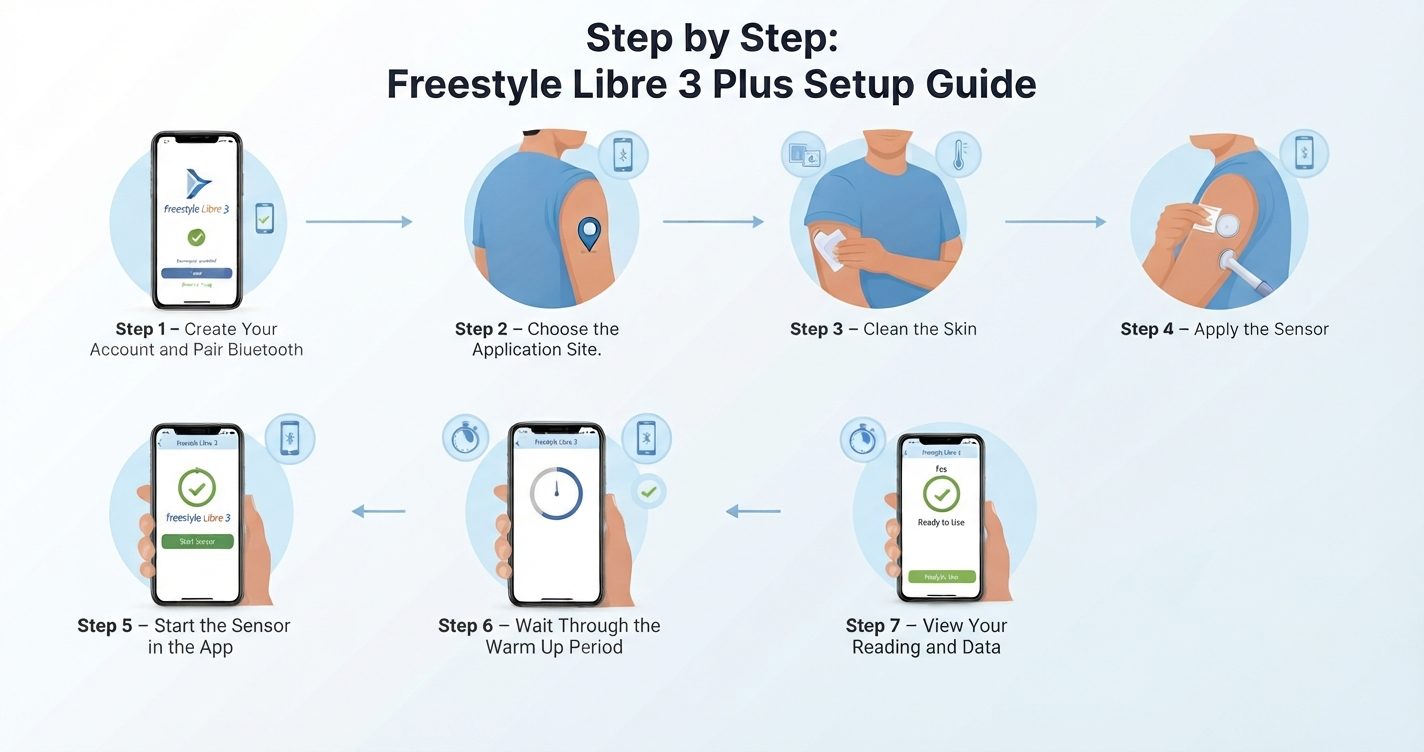
Follow this Freestyle Libre 3 Plus setup guide in order. Skipping ahead, especially past the skin prep step, is where most first time errors come from.
Licensed DME supplier. We verify your insurance before your first order and ship fast across all 50 US states.
Comparison Table: Libre 3 Plus vs Other Continuous Glucose Monitors
| Feature | Libre 3 Plus | Libre 2 Plus | Dexcom G7 |
|---|---|---|---|
| Wear duration | 15 days | 15 days | 10 days |
| Warm up time | 60 minutes | 60 minutes | 30 minutes |
| Scanning required | No, automatic streaming | No, automatic streaming | No, automatic streaming |
| Sensor size | Smallest in Libre line | Standard | Standard |
This kind of side by side view is useful because continuous glucose monitoring devices vary in small but meaningful ways, and the right choice often comes down to wear time, warm up speed, and how the device fits daily habits rather than raw accuracy alone, since all cleared devices meet similar accuracy thresholds.
Common Setup Errors and How to Fix Them
Even a well designed blood sugar meter can throw errors during onboarding, and no Freestyle Libre 3 Plus setup guide is complete without covering them. Here are the issues that come up most often, along with fixes that go beyond the generic troubleshooting most articles repeat.
Sensor will not pair: Turn Bluetooth off and back on, then restart the app rather than the phone first. A full phone restart is rarely necessary and wastes time during the warm up window.
Error message right after application: Wait a full 10 minutes before troubleshooting further. Many early errors clear on their own as the sensor filament settles under the skin.
No data after warm up ends: Move within 3 feet of the sensor and open the app manually. Background refresh settings on some phones can delay the first sync even after warm up completes.
Adhesive lifting within the first two days: This is more common in hot or humid weather. An overpatch applied at the edges, not covering the sensor body itself, can extend wear without affecting readings.
Reading Your Data Like a Professional
Once your continuous glucose monitoring system is active, the trend arrows matter as much as the number itself. A flat arrow with a stable number tells a different story than the same number with a sharp upward arrow. Many new users focus only on the glucose value and miss the direction, which is often more useful for deciding what to do next.
Set your high and low alerts during the first week based on guidance from your care provider rather than app defaults, since default thresholds are general and not personalized to your treatment plan.
When to Reach Out to Your Healthcare Provider
A Freestyle Libre 3 Plus setup guide can solve technical problems, but it cannot replace medical judgment. Contact your doctor or diabetes educator if you notice consistent unexplained readings, if the sensor reports values that do not match how you feel, or if you experience skin reactions that do not resolve after removing the sensor. This device is a monitoring tool, and decisions about insulin dosing or treatment changes should always involve a qualified professional.
How long does the Freestyle Libre 3 Plus sensor last?
Do I need to scan the sensor to get readings?
Why is my sensor stuck on warm up?
Can I shower or swim with the sensor on?
Is the Libre 3 Plus covered by insurance?
A correct setup in the first hour saves days of frustration later. This Freestyle Libre 3 Plus setup guide covers the technical steps, but the real skill comes with time, learning how your body's trends look on an ordinary day versus a day with more activity or stress. Give yourself the full 15 day cycle before judging how the sensor fits your routine, since the first sensor is often the hardest simply because everything is new.
This article is for general informational purposes and does not replace advice from a licensed healthcare provider. Always follow the instructions provided with your specific device and consult your doctor for medical decisions.